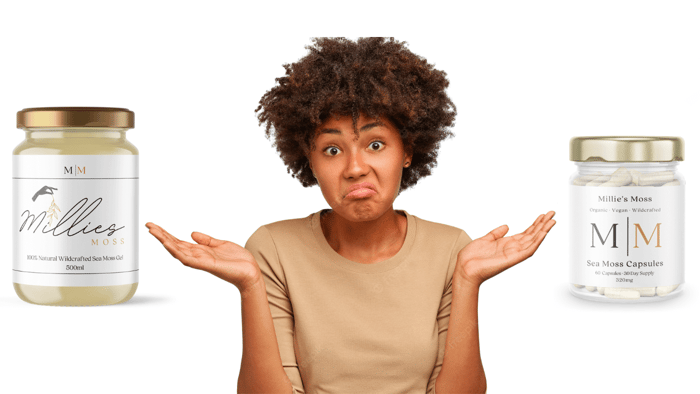
Sea moss is gel consists of a nutrient-dense seaweed that has been used for centuries for its various health benefits. It is rich in vitamins and minerals, including 92 essential minerals that are crucial for maintaining optimal health. One of the most common ways to consume sea moss is in the form of a gel, which is versatile and can be used in a variety of ways.
According to a study published in the Journal of Food Science and Technology, sea moss is a rich source of essential minerals and has been found to have a range of potential health benefits, including anti-inflammatory, anti-viral, and anti-tumor properties.
In this article, we will guide you through the process of making sea moss gel at home with the addition of lime, including the ratio of dried sea moss to the amount of gel produced, handling information, care instructions, and the benefits of using lime.
What You Will Need
To make 1 cup (240 ml) of sea moss gel, you will need:
- 1/4 cup (10g) of dried sea moss
- 2 cups of water
- 1/2 lime, juiced
- A blender
- A container to store the gel
- Soaking the Sea Moss with Lime
The first step in making sea moss gel with lime is to soak the dried sea moss in water with lime juice overnight, or for at least 6 hours. This will rehydrate the seaweed and infuse it with the flavour of lime whilst giving it a more natural taste.
Benefits of Adding Lime
Adding lime juice to your sea moss gel not only enhances its flavour, but it also provides several health benefits. Lime is high in vitamin C, which is essential for maintaining a healthy immune system. It also has natural antimicrobial properties, which can help to preserve the freshness of your sea moss gel.
Preventing Black Dots in Your Sea Moss Gel
During the blending process, small bits of seaweed can be difficult to fully blend and break down, resulting in small black dots in your sea moss gel. While these dots are common and harmless, there are ways to reduce their appearance in your gel. Before making the sea moss into a gel, rinse it thoroughly to remove any debris.
Care Instructions
When handling sea moss, it is important to ensure that it is clean of any debris. Rinse it thoroughly before soaking and blending. Additionally, make sure that your blender and storage container are clean and free of any residue that may contaminate the gel.
Boiling Sea Moss
Some people prefer to boil their sea moss before making it into a gel. Boiling can help to remove any excess salt or debris that may be present on the seaweed. To boil sea moss, add it to a pot with water and simmer for 20-30 minutes. Pour the gel into your container once cooled.
Making Sea Moss Gel (Blended)
After soaking the sea moss, rinse it thoroughly to remove any debris. Then, add the sea moss to a blender with 2 cups of water. Blend until the mixture has a smooth and creamy consistency. The amount of sea moss gel produced will depend on the amount of sea moss used. The more sea moss you use, the thicker the consistency of the gel will be.
Storing Sea Moss Gel
Once you have made your sea moss gel, it will need to be stored in the refrigerator for at least two hours to set and form as a gel. It is recommended to store the gel in a sterile container to extend its shelf life. The gel can be stored in an airtight container in the refrigerator for up to three weeks. It is important to note that the shelf life of the gel may vary depending on the freshness and quality of the sea moss used.
If you have excess sea moss gel, you can also freeze it in an ice cube tray for longer storage. This is especially convenient if you plan to use the gel in small amounts, such as in smoothies or as a thickening agent in sauces. Simply add a cube or two to your desired recipe and enjoy the benefits of sea moss.
For sea moss gel with added fruits, freezing is also recommended for longer shelf life. This will help to preserve the freshness of the fruits and prevent the gel from spoiling quickly. When you're ready to use the frozen gel, simply thaw it in the refrigerator overnight and use as desired. It's important to note that the texture and consistency of the gel may change when frozen and thawed, so it is best to consume it fresh if possible.
Using Sea Moss Gel
Sea moss gel is a versatile ingredient that can be used in a variety of ways. It can be added to smoothies, desserts, soups, sauces, and even used as a face mask.
When using sea moss gel in recipes, start with a small amount and gradually increase to your desired consistency. The amount you use will depend on the recipe and your personal preference. Sea moss gel is a natural thickener, so it can be used to replace traditional thickeners like cornstarch or flour.
Sea moss gel can also be used as a face mask to help nourish and hydrate the skin. Simply apply a thin layer to the face and let it sit for 10-15 minutes before rinsing off with warm water. It's important to note that sea moss gel should be used within its shelf life and not applied to the skin if it has started to spoil.
Overall, sea moss gel is a nutrient-dense and versatile ingredient that can be used to enhance the flavor and nutritional value of many recipes. With its many health benefits, sea moss gel is a great addition to any diet.
Conclusion: The Versatility and Benefits of Sea Moss Gel
Sea moss gel is a versatile and nutrient-dense ingredient that offers a range of health benefits. By making your own sea moss gel at home, you can easily adjust the consistency, store it properly, and use it in a variety of ways. With high-quality sea moss and fresh ingredients, you can enjoy the many benefits of sea moss gel, from enhancing the nutritional value of your recipes to nourishing your skin. Incorporate sea moss gel into your diet and reap the rewards of this powerful superfood.
 is here! Shop now, pay later in 4 easy installments


